Paths, Edges and Plant Placement: Designing a Border That Slugs Like Less
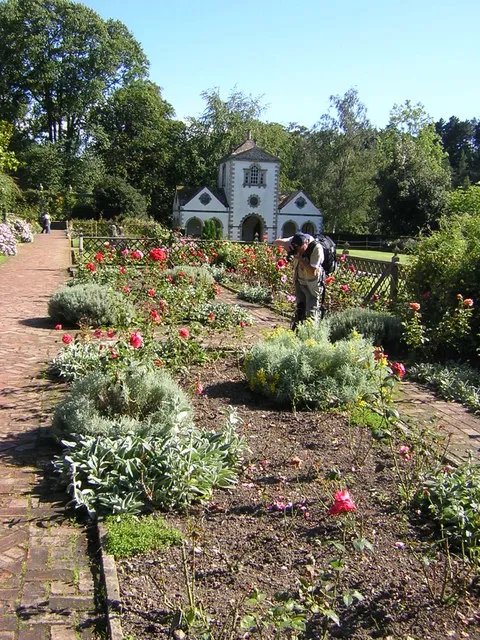
Photo: rob bishop, CC BY-SA 2.0, via Wikimedia Commons
Most slug advice starts with a product: a box, a bottle, a barrier. That is understandable, but it skips the bit that costs nothing and often works hardest — the layout of the border itself. If your hostas are tucked into a still, shady dip beside a puddled path, no amount of copper tape will fix the underlying problem. Design comes first. Products come second.
This is the No Slug approach for autumn 2026 and beyond: make the garden less welcoming to slugs in the first place, then use physical barriers only where your most vulnerable plants need a little extra help. No pellets, no panic, no pretending you can evict every slug in the postcode.
Start with a damp-zone sketch, not a plant list
Before you move a single pot, walk the garden after rain. Note where water sits, where moss gathers, where the soil stays sticky underfoot, and where the sun never quite reaches. Pay attention to downpipes, north-facing walls, overgrown corners and the strip behind the shed that nobody likes to think about. Those are the places slugs will use as highways and hotels.
A rough pencil sketch is enough. Mark the wet zones, the dry zones and the route you actually walk. In a small plot, this matters more, not less: a tiny garden has fewer places for slugs to be, but it also has fewer places for plants to escape them. In a rented garden, the sketch helps you work with what you have rather than digging up someone else's patio.
Make the edge do some work
Border edges are often overlooked. A deep, shadowed lip between lawn and soil gives slugs a cool, damp ledge to follow. A crisp edge is easier to monitor and dries faster. It does not have to be military-straight, but it should not be a soft tunnel of wet grass flopping over the soil.
Where you need a barrier, keep it narrow and deliberate. A clean strip of gravel, a removable copper band around a raised bed, or a rough dry mulch around a precious clump can all help. The point is not to build a fortress. It is to create a small, dry, uncomfortable zone that makes slugs work harder to reach the plant you care about. Keep the barrier free of fallen leaves and check it after heavy rain, because a soaked barrier is just a damp bridge.
Paths, airflow and the puddle problem
A path that puddles is a slug hotel with a doormat. Fix the drainage before you worry about the planting. Slightly raised, free-draining paths are better than sunken ones, and permeable surfaces are useful only if they actually drain rather than storing moisture underneath. In awkward shady corners, improve airflow by thinning overcrowded planting and lifting low foliage away from the soil. You are not trying to create a desert. You are trying to remove the still, humid pockets where slugs thrive.
Mulch needs a bit of thought, too. A thick, unbroken layer of wet mulch pressed against a tender plant is an invitation. Keep a small clear ring around the stems of vulnerable plants, and use mulches that dry out reasonably well on the surface. In winter, the aim is cover for your soil, not a permanent duvet for slugs.
Put vulnerable plants behind the perimeter
This is the heart of the blueprint. Your most slug-prone plants — hostas, delphiniums, lettuce, seedlings, anything soft and lush — should not be scattered through the dampest part of the border. Group them where you can see them, reach them and monitor them. Put them near a path, in a raised bed, in pots with feet, or behind a simple barrier zone. It is much easier to protect one well-placed group than twenty vulnerable plants spread across the garden.
Tougher plants can go at the wet end. That is not a licence to sacrifice them, but it is a sensible use of the space. A border that works with the moisture you have is more resilient than one that pretends the damp corner is going to dry out because you have planted something expensive in it.
Small plots and rented gardens
In a small garden, think in containers and zones. A raised bed with a copper band, a gravel tray under pots, or a removable barrier around a veg patch can all be lifted and changed when you move. Rented gardens reward the same approach: no permanent hard landscaping, no huge spend, just a few well-placed defences that come apart when you do. A pot with feet dries underneath, which is a small but genuine advantage. A saucer left full of water is not.
The awkward shady corner
Shade is not the enemy. Stagnant, airless, waterlogged shade is. Thin the planting, divide crowded perennials, lift low branches and improve drainage where you can. If the corner stays wet, use it for plants that tolerate moisture and keep your most tempting hostas elsewhere. You are allowed to stop fighting the site.
A simple border plan for the season ahead
- Walk the garden after rain and mark the damp zones.
- Fix the worst puddles and open up airflow in shady corners.
- Move vulnerable plants into a grouped, visible position.
- Create one narrow, pellet-free barrier around that group.
- Keep edges crisp and barriers clear of wet leaves.
- Accept that some slugs will always be present, and aim for balance rather than extermination.
A slug-lean border is not a border without slugs. It is a border where the layout does half the work, the barriers do a smaller share, and your best plants are not left to fend for themselves in the wettest corner. That is a kinder, cheaper and far more reliable place to start.